Introduction
In this tutorial, we’ll build our first-ever full-stack application using Spring Boot for the backend and React for the frontend. Our application will:
- allow users to input numbers, store them in a PostgreSQL database
- visualize how many times each number was input on a chart
The code is available on my GitHub
The final application will look like this:

Part 1: Setting Up the Development Environment on Windows
I’ll be using PowerShell as my terminal, and I’ll assume you’re using Windows 11.
1.1 Install PowerShell and Windows Terminal
Install PowerShell from the official GitHub repo Install Windows Terminal in Microsoft Store, or its official GitHub repo if your computer does not allow you to install apps from the Microsoft Store.
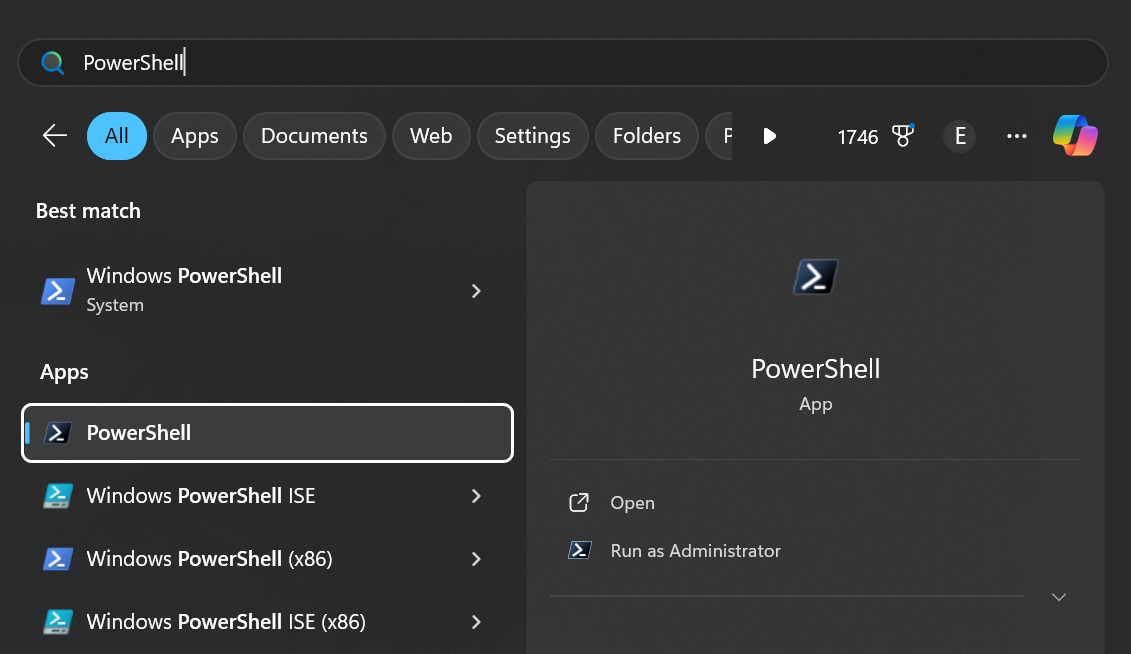
Note this is not “Windows PowerShell”, it’s a newer version of PowerShell that’s redesigned to be cross platform compatible.
Look at the screenshot below, after you install the “PowerShell”, you will have 2 PowerShell when you search in the start menu, what the “PowerShell” will be used in the tutorial is the one without the “Windows” branding.
1.2 Installing Java Development Kit (JDK)
We’ll use JDK 21 from Adoptium for this project:
- Visit https://adoptium.net/
- Download and install latest LTS version
Remember to add the JDK bin directory to your PATH environment variable.
1.3 Install Maven
Maven is a build automation tool used to manage the build process of a project. It helps manage dependencies, compile code, and run tests. Spring Boot is built on top of Maven, so we’ll need to install Maven.
Just download Maven jar from official site and drop it to any directory which is in your PATH environment variable.
1.4 Installing Node.js using fnm (Fast Node Manager)
For Windows users, we’ll use fnm to manage Node.js versions, follow the instructions on offcial repo, mainly including:
- install with winget:
winget install Schniz.fnm - add
fnm env --use-on-cd | Out-String | Invoke-Expressionto your PowerShell profile- your PowerShell profile should be in
$profile, you could open it using the commandnotepad $profile - if
$profiledoes not exist, create it using PowerShell commandnew-item -type file -path $profile -force
- your PowerShell profile should be in
- add
.node-versionwith the version number of your choice
- The content inside the file should look like, for example:
120 - when you navigate to the directory which contains the
.node-versionfile, fnm will check the version defined exists in your computer, and if not, it asks you whetherinstall it
- The content inside the file should look like, for example:
1.5 Installing Visual Studio Code
Download and install VS Code from https://code.visualstudio.com/
Install the following extensions:
- Extension Pack for Java
- Spring Boot Extension Pack
1.6 Installing Docker
Two options:
- Spin up a Linux VM and install Docker in it
- Download and install Docker Desktop from https://www.docker.com/products/docker-desktop
I chose the first one just because I am more familiar with Linux, and I’m not sure if it’s possible to run Docker Desktop in Windows.
Part 2: Setting Up the Spring Boot Backend
2.1 Setting Up PostgreSQL Database
PS. I run this in a separate Linux VM, try it if you want to run this in Docker Desktop.
The backend stores data in a PostgreSQL database, so we’ll need to setup a PostgreSQL database and create a table to store the data.
Connect to your Linux VM, run the following commands in your terminal:
| |
You’ll be dropped into the psql shell, run the following commands to create a database and a table:
| |
2.2 Creating a New Spring Boot Project
Open VS Code
Press
Ctrl+Shift+Pand select “Spring Initializr: Create a Maven Project”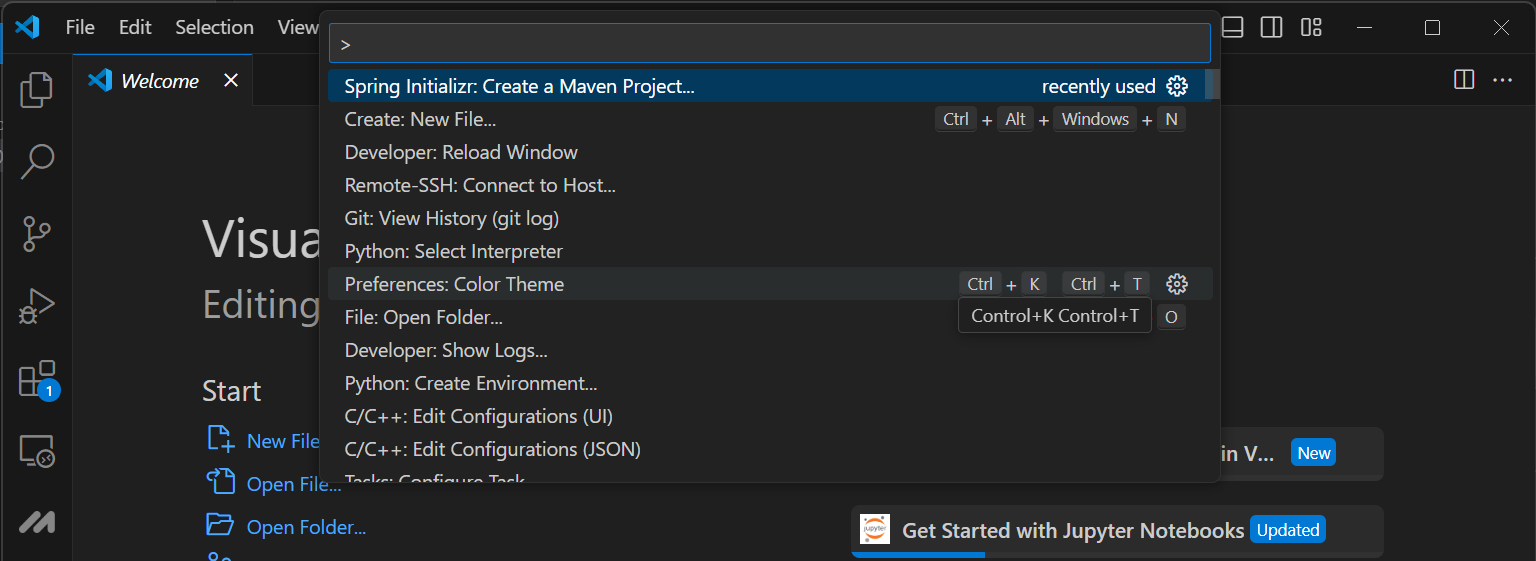
Choose the following options:
- Spring Boot version: (latest version)
- Language: Java
- Group Id: com.example
- Artifact Id: number-input
- Packaging type: (whichever is fine)
- Java version: (the version you installed in step 1.3)
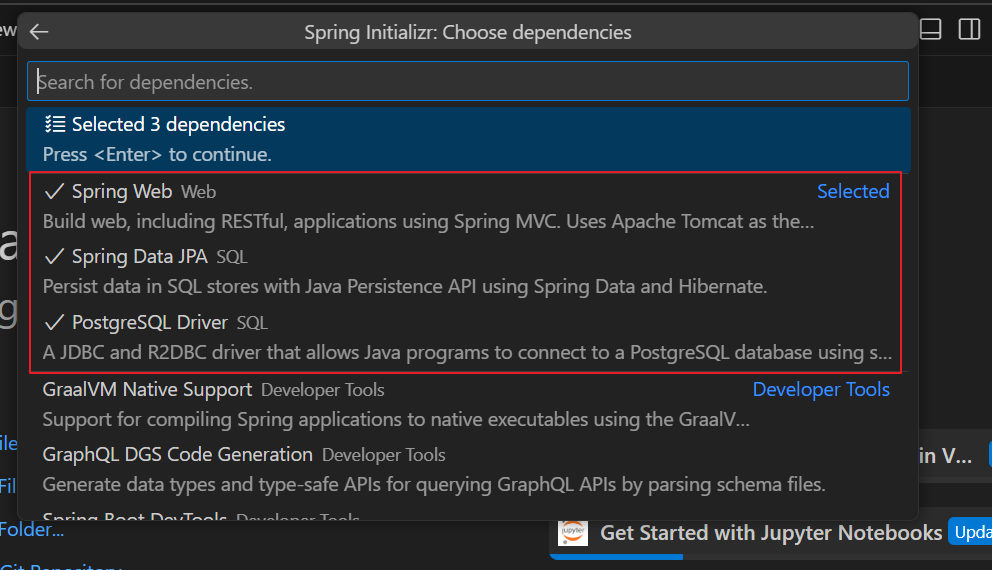
Select the following dependencies:
- Spring Web
- Spring Data JPA
- PostgreSQL Driver
You should be able to see the following dependencies in the list after you select the dependencies:
2.3 Configuring Database Connection
Note: Rembmber to change url to your Linux VM IP address in the following steps.
Now, let’s configure our Spring Boot application to connect to the PostgreSQL database. Open the src/main/resources/application.properties file and add the following:
| |
2.4 Creating the Entity
Note: in some older tutorials you might see import javax.persistence.*; instead of import jakarta.persistence.*, this is because some historical versions of Spring Boot use javax.*, but nowadays it’s name has been changed to jakarta.*.
In Spring Boot with JPA, an entity represents a table in your database. It’s a simple Java class that’s mapped to a database table. Using entities allows us to work with database records as Java objects, abstracting away much of the complexity of database operations.
Let’s break down the annotations:
@Entity: Marks this class as a JPA entity.@Table: Specifies the name of the database table this entity maps to.@Id: Marks the field as the primary key.@GeneratedValue: Configures the way of increment of the specified column(field).@Column: Specifies the mapped column for a persistent property or field.
Create src/main/java/com/example/number_input/NumberInput.java:
| |
2.5 Creating the Repository
Next, we’ll create a repository interface. In Spring Data JPA, repositories are interfaces that provide a powerful way to interact with your database without writing complex SQL queries.
This interface extends JpaRepository, which provides CRUD operations out of the box. We’ve also added a custom query method getNumberCounts() that will return the count of each number input.
Create a new interface src/main/java/com/example/number_input/NumberInputRepository.java:
| |
2.6 Creating the Service
Now, let’s create a service class to encapsulate our business logic.
This service class provides methods to save a number and retrieve the counts of all numbers:
Create src/main/java/com/example/number_input/NumberInputService.java:
| |
2.7 Creating the Controller
Finally, let’s create a REST controller to expose our API endpoints.
This controller provides two endpoints:
POST /api/numbers: To save a new numberGET /api/numbers/counts: To retrieve the counts of all numbers
The @CrossOrigin annotation allows requests from our React frontend (which will run on http://localhost:3000).
Create src/main/java/com/example/number_input/NumberInputController.java:
| |
Part 3: Setting Up the React Frontend
3.1 Creating a New React Project
In PowerShell, change to the directory where you want to create your React project (you probably have defined .node-version in that directory), and run the following commands:
| |
Open the the directory in VS Code for further modifications, you could use code . command to open the current directory in VS Code.
3.2 Implementing the React Application
- The API calls are already implemented in the React code above using axios.
- We’ve used react-chartjs-2 for data visualization, which is already implemented in the React code below.
- We use State Hook to manage the state of the input number and the number counts.
Replace the content of src/App.js with the following code:
| |
Part 4: Run the Application
4.1 Run the Spring Boot Backend
In PowerShell, change to the directory where you created your Spring Boot project, and run the following command:
| |
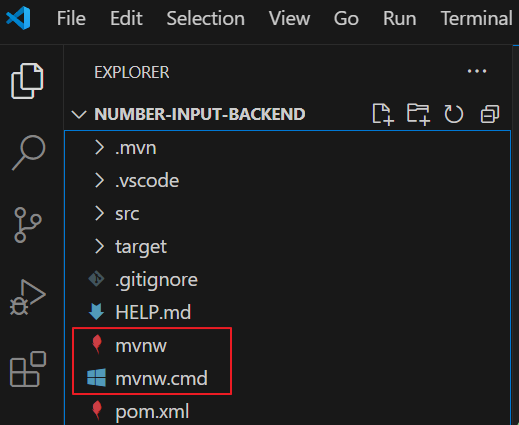
mvnw is a Maven wrapper script that allows you to run Maven commands, you should see it in your project directory.
After executing the command, you will see logs on terminal like below:
| |
you can see the backend is listening on port 8080.
4.2 Run the React Frontend
In PowerShell, change to the directory where you created your React project, and run the following command:
| |
After executing the command, you will see logs on terminal like below:
| |
You can see the frontend is listening on port 3000, our first full-stack application is ready to use.
Part 5: Q&A for Newbies
Q: Why doesn’t the backend need to define anything to serialize responses as JSON? A: Spring Boot automatically includes and configures Jackson (a JSON processor) and appropriate HttpMessageConverters. When a method in a @RestController returns an object, Spring Boot automatically tries to convert it to JSON.
Q: Is the
getNumberCountsmethod returning JSON as well? A: Yes, it is. The method returns aMap<Integer, Long>wrapped in a ResponseEntity. Spring Boot automatically serializes this to JSON, resulting in a response like{"1": 5, "2": 3, ...}.Q: Why does the
saveNumbermethod in the controller not need to specify an API endpoint? A: The endpoint is actually specified at the class level with@RequestMapping("/api/numbers"). The@PostMappingannotation without parameters means this method will handle POST requests to the base path, resulting in the full endpoint/api/numbers.Q: What’s the difference between using a functional component with hooks and a class component in React? A: Functional components with hooks are generally simpler, more concise, and easier to test and reuse. They also allow for better code organization and avoid issues with
thisbinding that can occur in class components.
Conclusion
This tutorial has guided you through creating a full-stack application using Spring Boot and React. We’ve covered setting up the development environment, creating a backend API with Spring Boot, building a frontend with React, and integrating the two. The concepts and Q&A sections should help clarify some common points of confusion for newcomers to these technologies.
Remember, building full-stack applications involves many moving parts, and it’s normal to encounter challenges along the way. Don’t hesitate to consult the official documentation for Spring Boot and React, and make use of community resources when you need help.
Happy coding!